Creating custom nameservers
A private nameserver is a nameserver branded with your own domain. For instance, ns1.yourdomain.com and ns2.yourdomain.com are custom/private nameservers. Having your own private nameservers is only usually useful if you are planning on running your own web hosting company with a Reseller Hosting plan and want to keep your nameservers whitelabel/branded.
1. Registering Your Nameservers
To begin, you will have to register your nameservers at your domains registrar. We will only go through the domain nameserver registration process at Asura Hosting, but the process is mostly the same at every registrar.
-
Log in to our Client Area and navigate to Domains > My Domains > Click on the domain you would like to add custom nameservers for.
-
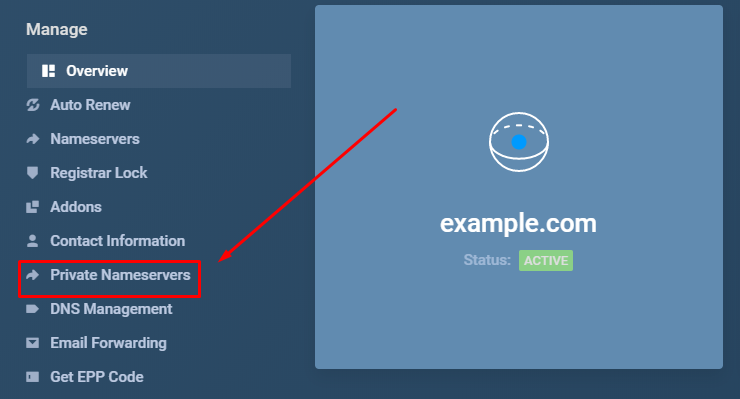
You will then be greeted by the normal domain overview page for that particular domain. On the left side of the page, you will notice a "Manage" block with a list of actions that you can perform on the domain, click on the "Private Nameservers" option.
-
Within the Private Nameservers page locate the "Register a Nameserver Name" form. Simply add the sub-domain prefix you would prefer to use like "NS1" and the servers IP address that your domain is using within the form as shown below.
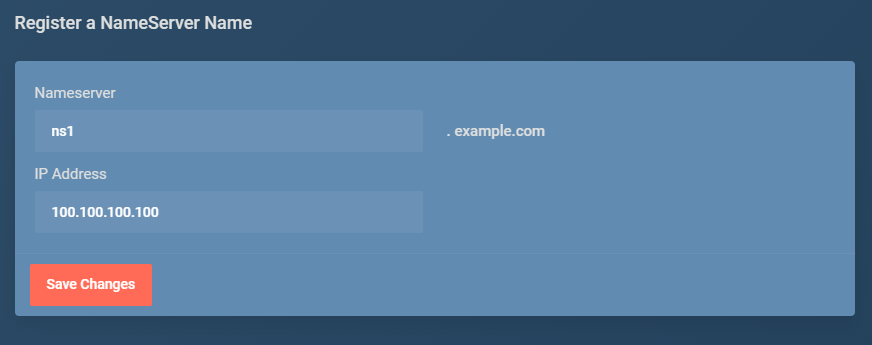 Click "Save Changes" and the new private nameserver will now be registered, do remember to register both nameservers. (ns1.yourdomain.com and ns2.yourdomain.com)
2. Adding the new nameservers DNS records
Now that your domains nameservers are registered you will need to add DNS records for them. This is done within your domains hosting account or where you have your domains DNS hosted. We'll go through both the process on cPanel and DirectAdmin.
Adding your nameservers DNS in cPanel
-
Log in to your cPanel account. (Login URL is usually found at example.com:2083)
-
Navigate to the Domain Section > Zone Editor
-
Add the "A" records for the nameserver by clicking on the "A Record" button next to the domain name.

-
Fill in the form with the nameservers details including the servers IP and the nameserver itself.
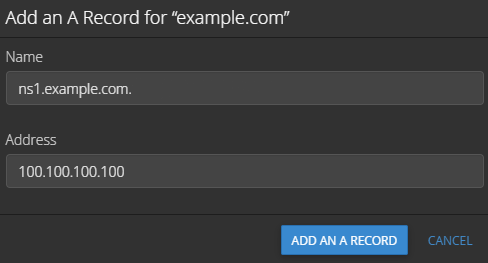
Once you have added the needed details, click on the "Add an A Record" button and your DNS changes should now take effect. Make sure to do this with both your nameservers.
Adding your nameservers DNS in DirectAdmin
-
Log in to your Direct Admin account. (Login URL is usually found at example.com:2222)
-
Navigate to the Account Manager section > DNS Management
-
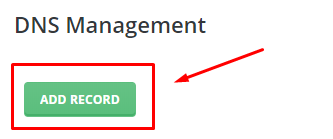
Click on the "Add Record Button"
-
Fill in the form with all the nameservers details, including the servers IP and the nameserver itself. Make sure to have the Record Type set to "A"
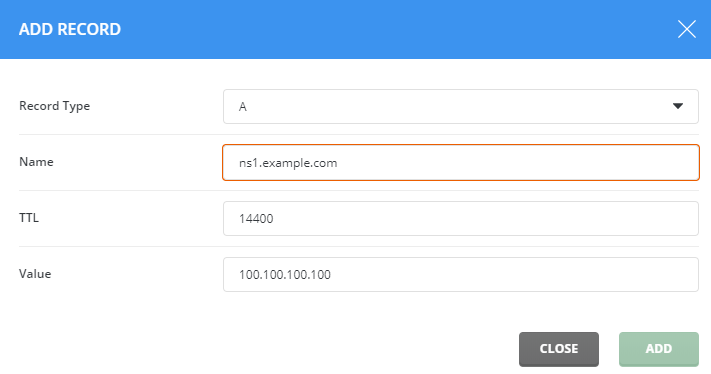
Once you have added the needed details, click on the "Add" button and your DNS changes should now take effect. Make sure to do this with both your nameservers.
Please do allow a couple of hours to pass for the DNS to propagate throughout the world before making use of your new nameservers.