How to Upgrade WHMCS through Softaculous
In this guide, we will walk you through the steps to upgrade WHMCS using Softaculous, a popular auto-installer tool available in all our Web Hosting Plans.
We typically recommend upgrading through Softaculous rather than using WHMCS's upgrade tool as that is prone to PHP timeouts and limits. Upgrading in Softaculous is instant and does not rely on PHP processes to complete.
Step 1: Accessing Softaculous
-
Log in to your web hosting control panel (e.g., cPanel, DirectAdmin).
-
Look for the Softaculous Apps Installer or Softaculous icon, and click on it.
Step 2: Locating & Upgrading WHMCS in Softaculous
-
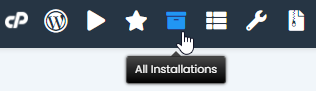
In Softaculous click on the "All Applications" button. This can be found on the top-right icon list, as illustrated below:
-
Click on the Upgrade icon next to your WHMCS installation to proceed with the upgrade.
-
It will prompt you with a request for your WHMCS admin folder name. Leave this as "admin" unless you have changed your WHMCS admin folder to a custom name, in that case you would then use the custom admin folder name you have set for your WHMCS.
-
Click on the Upgrade button and then it'll automatically upgrade the WHMCS instantly. All you have to do now is delete the Install folder located in your WHMCS folder to fully complete the upgrade.